If you’ve been scrolling through design inspo boards lately, chances are your eyes have been snatched by some juicy, bold, 3D typography posters. They’re loud, proud, and dripping with modern energy. In this 3D Typography Poster Design Tutorial, we’re diving into how you can create these show-stopping visuals from scratch — even if you’re not a 3D wizard. It’s bold design, but make it DIY.
Let’s flex those creative muscles and cook up something that doesn’t just speak — it shouts.
🎯 What Is 3D Typography Poster Design?
Before we dive into the how-to, let’s unwrap the why. 3D typography poster design is all about giving your letters dimension, drama, and depth. It blends type with sculptural visuals, often merging graphic design with light 3D modeling techniques or using smart tricks in 2D software to fake the look.
These posters are dominating digital platforms because they:
- Grab attention in less than a second
- Combine form and function
- Allow endless experimentation
- Are highly shareable (perfect for Insta, Behance, and Pinterest)
And let’s be real: they just look cool.
🔧 Tools You’ll Need for This 3D Typography Poster Design Tutorial
You don’t need to sell a kidney to get started. Here are three routes — pick your fighter based on your vibe and tool access:
Option A: Adobe Illustrator + Photoshop (for faux 3D in a flat world)
Option B: Adobe Dimension or Blender (for full-on 3D feels)
Option C: Canva + Smart Layered Effects (for beginners who want the look without the tech stress)
Step 1: Choose a Word That Packs a Punch
Your poster’s hero is the word. Make it short, strong, and meaningful. Think:
- “LUSH”
- “VOLT”
- “CRUSH”
- “GLITCH”
- Or your brand name, like “Ocravio”
💡Pro tip: 3D typography poster design works best with 4-6 letter words. The shorter the word, the more impact each letter carries visually.
Step 2: Pick a Bold Font With Personality
Now we dress up that word. You need a font with a bit of drama — chunky, geometric, or experimental fonts shine here.
Some hot picks:
- Neue Machina – for techy, clean vibes
- Druk Wide – for brutalist impact
- Puffin Display – for fun, bubbly visuals
- Manofa or Made Mirage – for elegant distortion
Install your font, type out your word in Adobe Illustrator (or whichever tool you chose), and let it sit large and proud on your canvas.
Step 3: Add the 3D Sauce
Here’s where the magic happens in our 3D Typography Poster Design Tutorial.
If you’re using Illustrator:
- Select your word
- Go to Effects > 3D > Inflate or Extrude & Bevel
- Play with rotation, depth, and shading until it feels alive
If you’re in Blender or Dimension:
- Import the word as a 3D object
- Add lights, shadows, and textures
- Export with a transparent background
For Canva creatives:
- Duplicate the text
- Offset and blur the back layer
- Add a gradient or shadow for depth illusion
💥 That’s it! You’ve faked the 3D without a single polygon render!
Step 4: Create a Poster Background That Pops
Let’s not leave our beautiful word floating in the void. A good background makes the 3D text sing.
Try these styles:
- Gradients: Try dreamy duotones or neon fades
- Textures: Add a grain overlay, paper texture, or metallic sheen
- Patterns: Abstract shapes, grunge overlays, or modern noise textures
Remember: contrast is king. Your 3D type should pop, not disappear.
Step 5: Add Graphic Elements (But Don’t Overcrowd)
Minimal but impactful — think sparkles, lines, blobs, arrows, and grids. These little elements can guide the eye or reinforce your theme.
But here’s the deal: let your 3D typography be the star. Treat everything else like backup dancers. ✨
Step 6: Experiment With Color & Texture
Now play like a mad scientist.
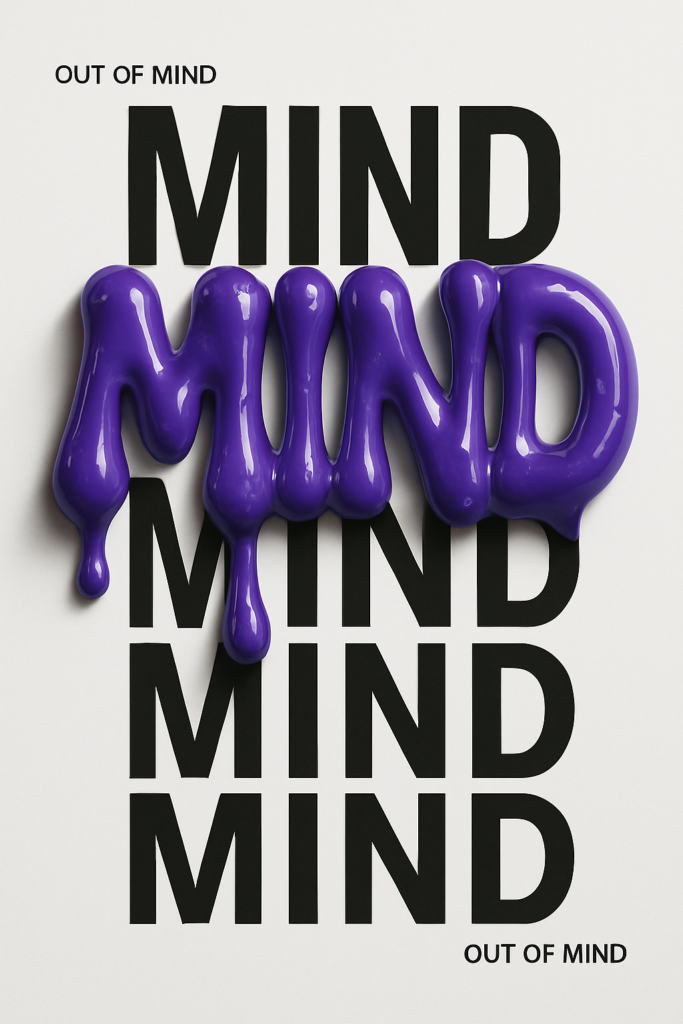
- Metallics (chrome, gold, foil)
- Liquids (melting, dripping text)
- Glass or bubble textures
- Holographic effects
You can either apply textures directly or use mockup files and clipping masks in Photoshop to “wrap” your text in that vibe.
Step 7: Export Like a Pro
Before you post that beauty online or drop it into a portfolio:
- Export in high resolution (300 DPI for print, 72 DPI for web)
- Save as PNG or JPG
- Keep layered PSD/AI files safe in case you wanna remix it later
🚀 Posting & Promoting Your Poster Online
Once you’ve crafted your masterpiece with this 3D Typography Poster Design Tutorial, don’t let it sit in a lonely folder. Show it off!
- Post it on Instagram with design hashtags
- Create a carousel of your process
- Add it to Behance with a mockup and breakdown
- Turn it into a Reel or YouTube Shorts timelapse
Use keywords like “3D typography poster,” “bold type design,” and “graphic poster tutorial” in your captions and descriptions to boost your SEO game even further.
Recap: Your 3D Typography Poster Design Checklist
✅ Choose a short, bold word
✅ Pick a chunky, high-impact font
✅ Apply 3D effects or fake them smartly
✅ Design a poppin’ background
✅ Sprinkle extra elements (sparingly)
✅ Play with color, lighting, and texture
✅ Export and post with pride
Final Words: Why This 3D Typography Poster Design Tutorial Slaps
Creating a 3D typography poster isn’t just a flex — it’s a way to make your brand, story, or message unforgettable. With this step-by-step tutorial, you can build designs that aren’t just pretty, they’re powerfully you.
And hey — if you don’t want to do it all yourself, your girl Duaa at Ocravio is right here designing the boldest, most brain-bending visuals in the game.
Want more tutorials like this? Follow Ocravio.online for design deep-dives, branding tips, and creative hacks that level up your visual game.